

This document provides step-by-step guidelines on ClickUp integration. Firstly, you need to understand the following terminologies in order to know how ClickUp works
- Team: This is the first thing a user needs to set when working on ClickUp. Without setting up a team you cannot use any ClickUp functionality. The team contains workspaces.
- Workspace: This is dependent on the team. You cannot set a workspace without first setting a team. The workspace contains folders.
- Folder: This is dependent on the workspace. You cannot set a folder without first setting a workspace. The folder contains task lists.
- Task List: This is dependent on the folder. You cannot set a task list without first setting a folder. task list contains tasks.
- Task: This is dependent on the task list. You cannot set a task without first setting a task list.
Now we will show you how to set up the ClickUp integration with your account :
Connect with ClickUp
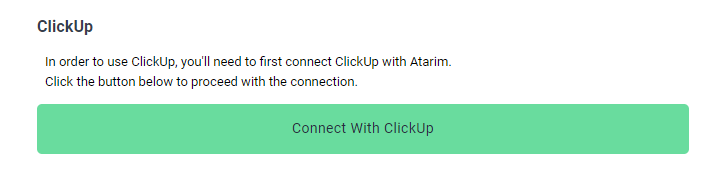
- Firstly, you need to connect your ClickUp account with the agency dashboard. You have to go to Settings> Integration Settings and click on “Connect with ClickUp“.
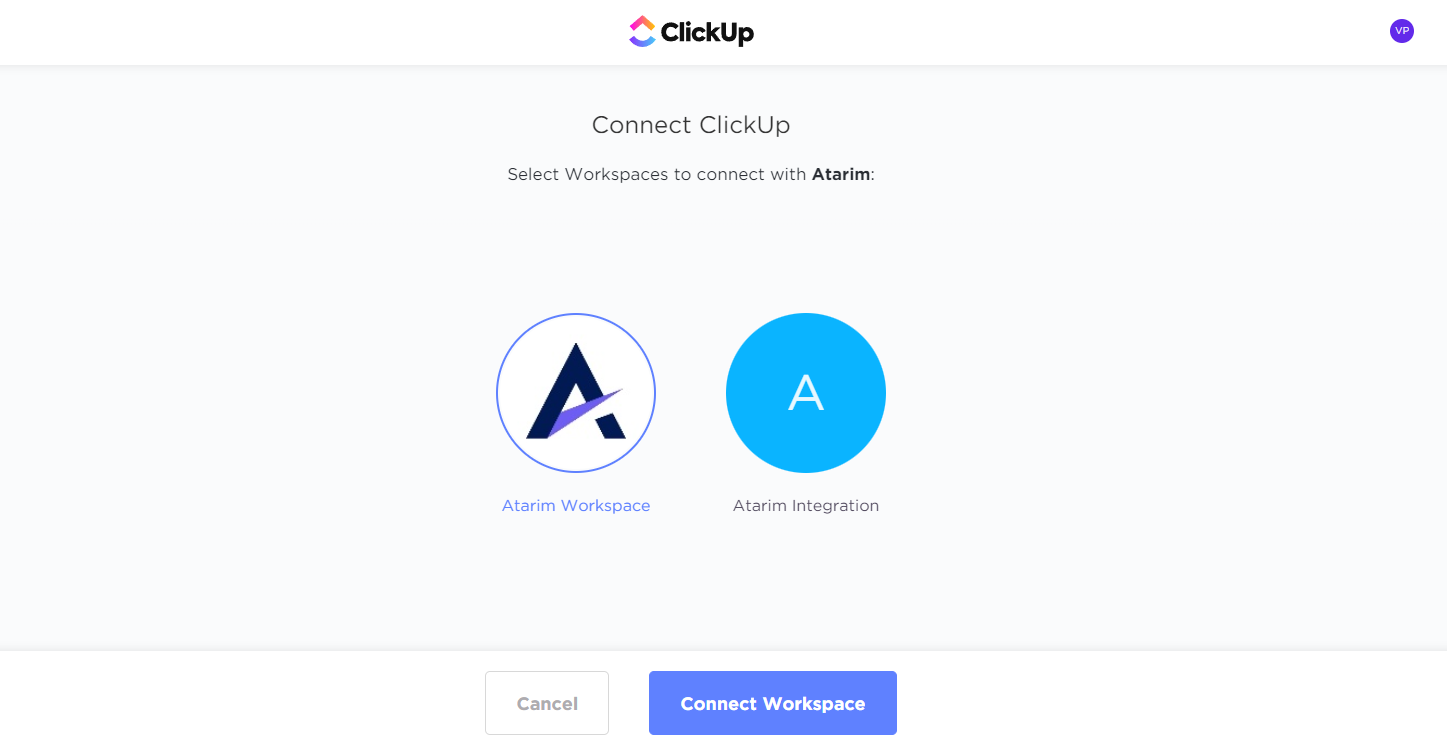
- After clicking on ClickUp, you have login into your account and choose the workspace.
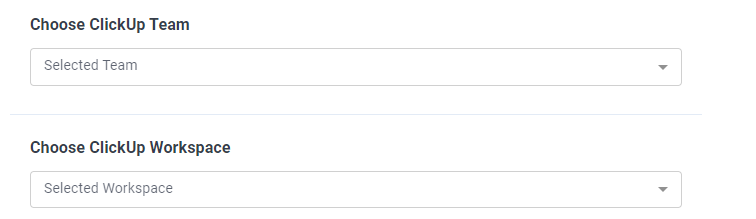
- After choosing your workspace, you can also select your team and workspace from settings.
Push Atarim tasks to ClickUp
When your task is created on the dashboard, you can also push it to ClickUp as well.
- Firstly, you have to open the task that you need to push to ClickUp.
- Inside the task, you can see the “Push to ClickUp” option on the extreme right column.
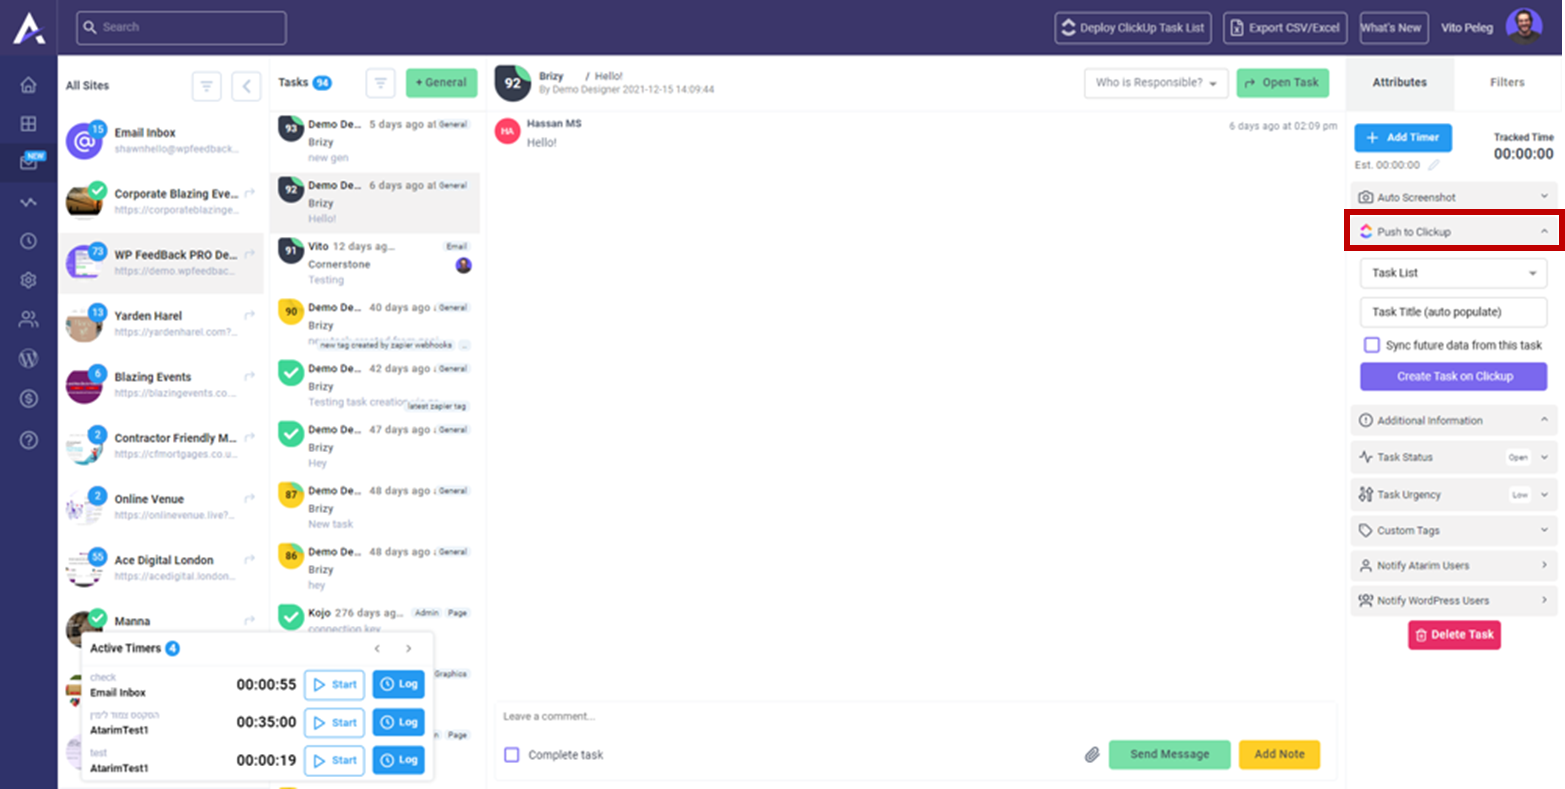
- Select the task list and Enter the task title you need to push.
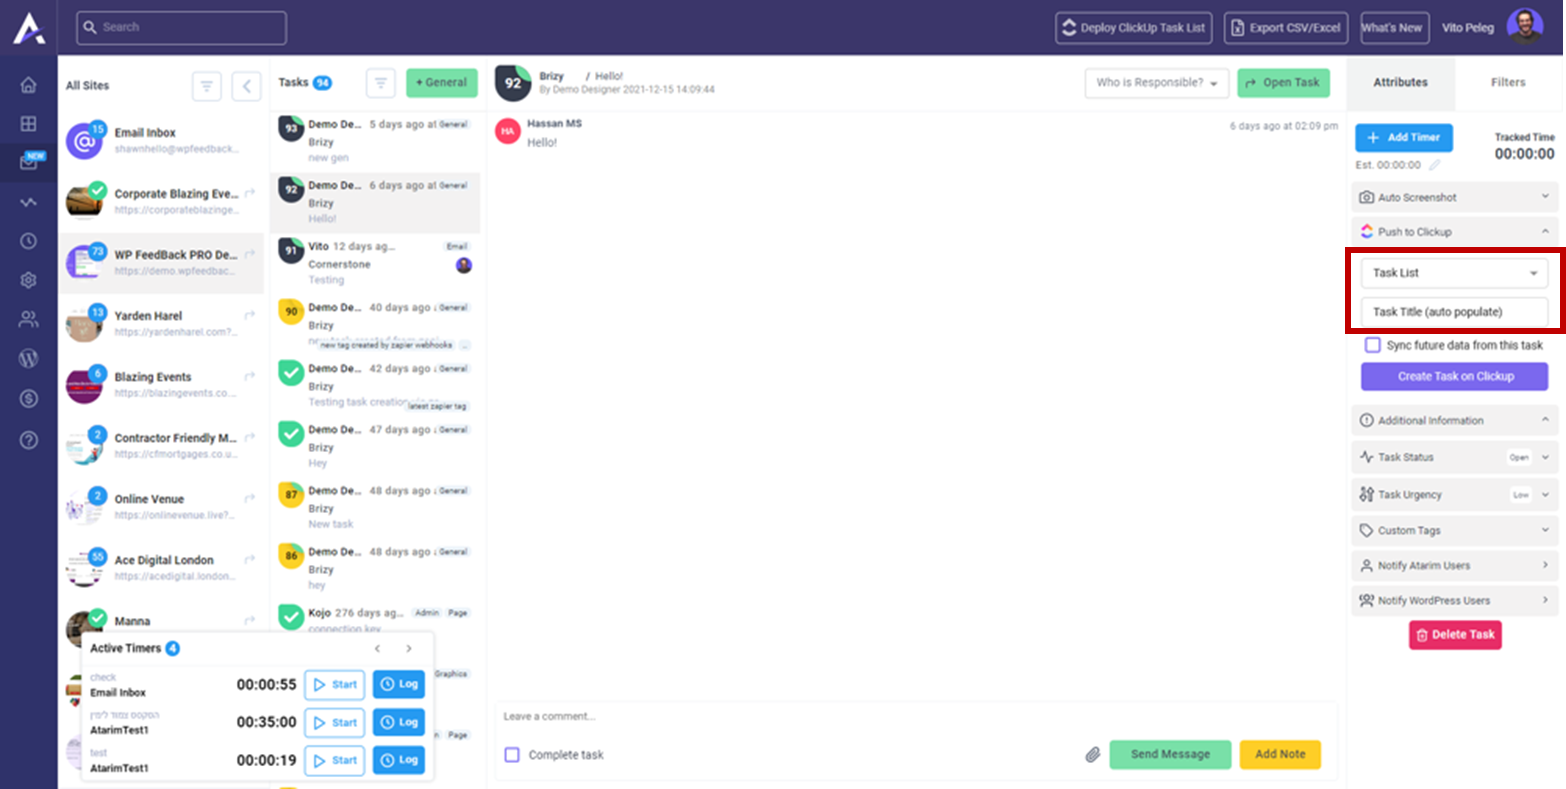
- If you want to sync future data from this task, you can click on the checkbox.

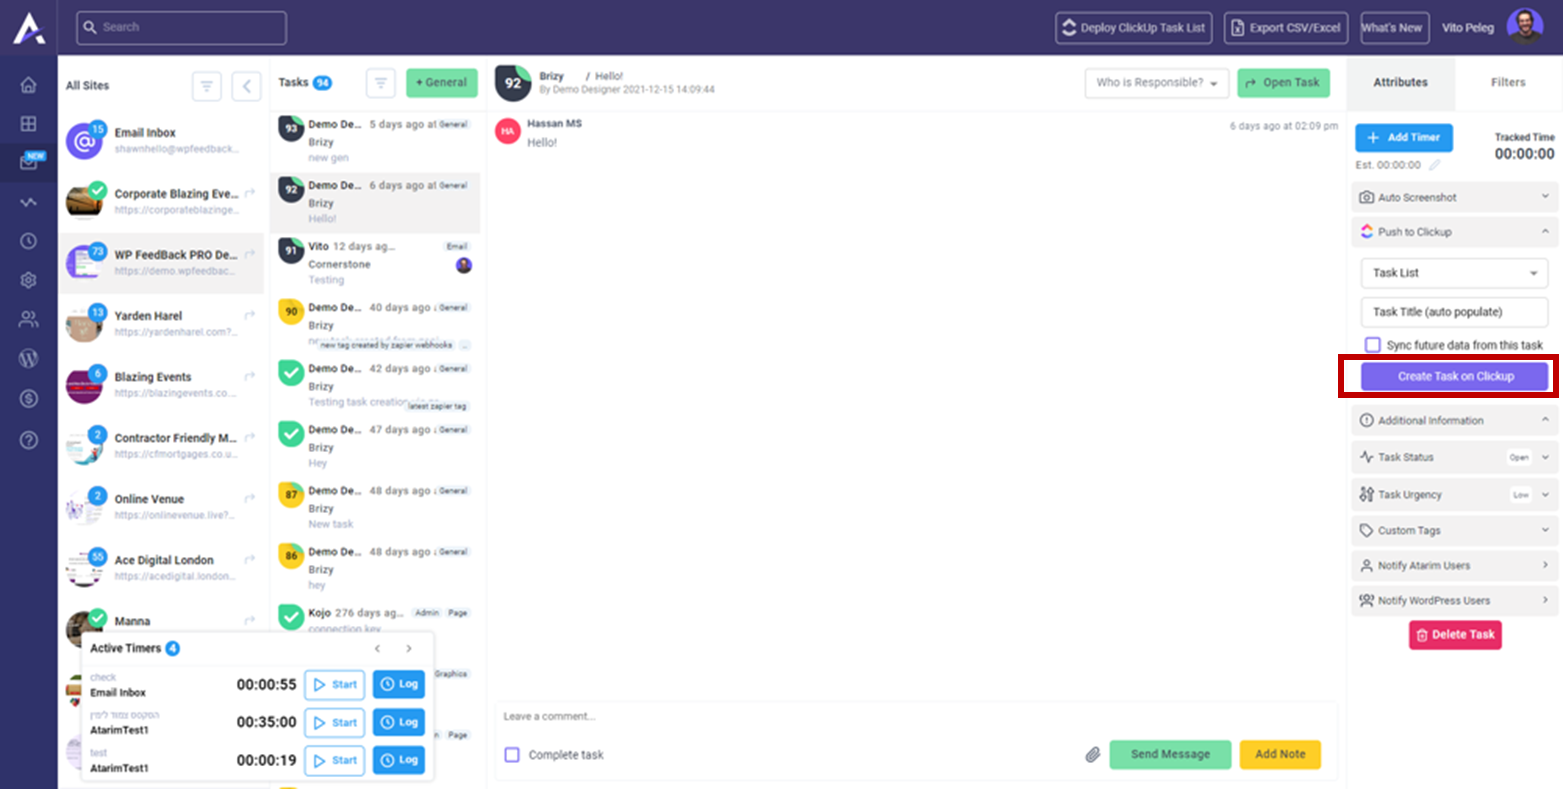
- Now you have to click on “Create a task on ClickUp”
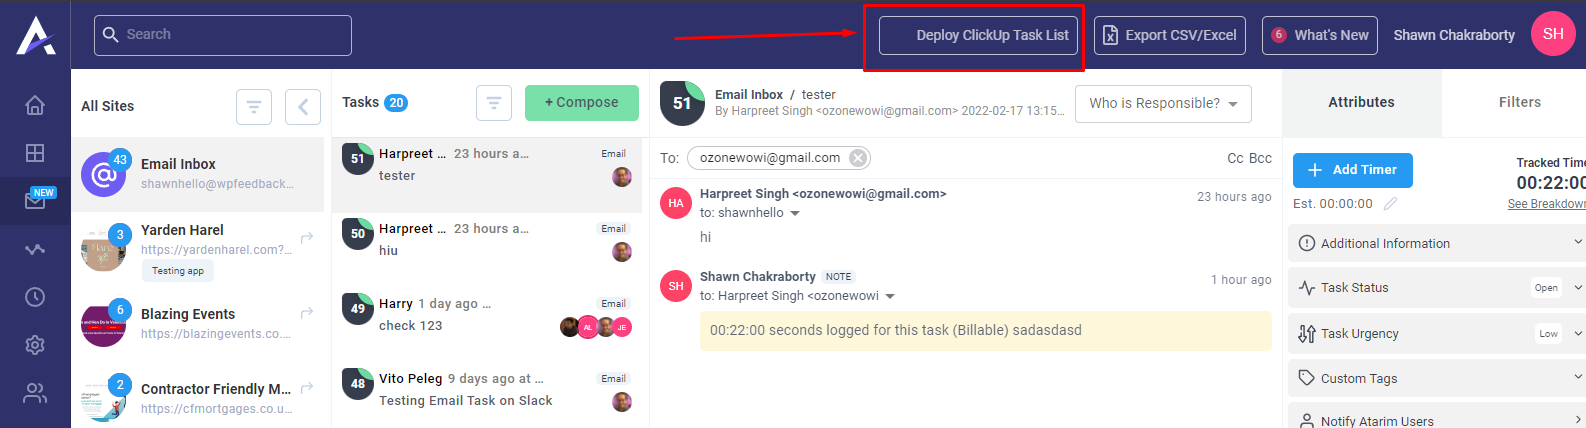
Deploy ClickUp to Atarim Tasks
Now, we can also pull tasks from Clickup and push them to Atarim. Here’s how you can do it:
- Click on “Deploy ClickUp Task list” from the top bar.

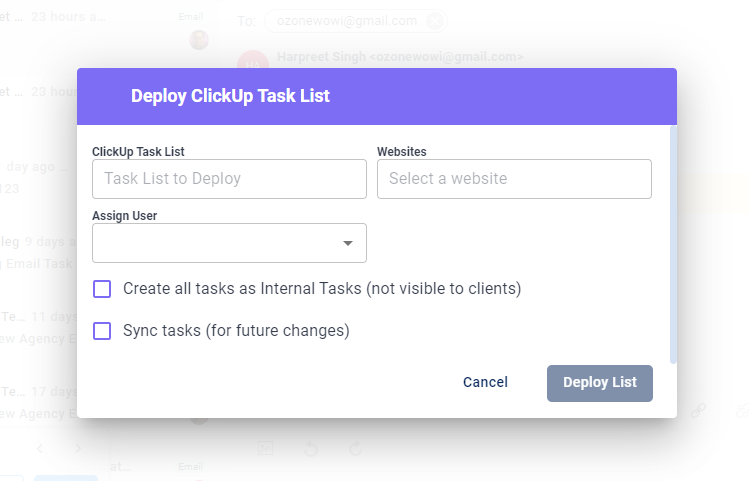
- It will show a popup where you have to select the task list, website, and user. You can also choose to create all tasks as internal tasks. In addition, if you need to sync tasks from ClickUp into the agency dashboard, you can click on the checkbox and click on deploy list. After deploying, it will be shown on the website you selected.
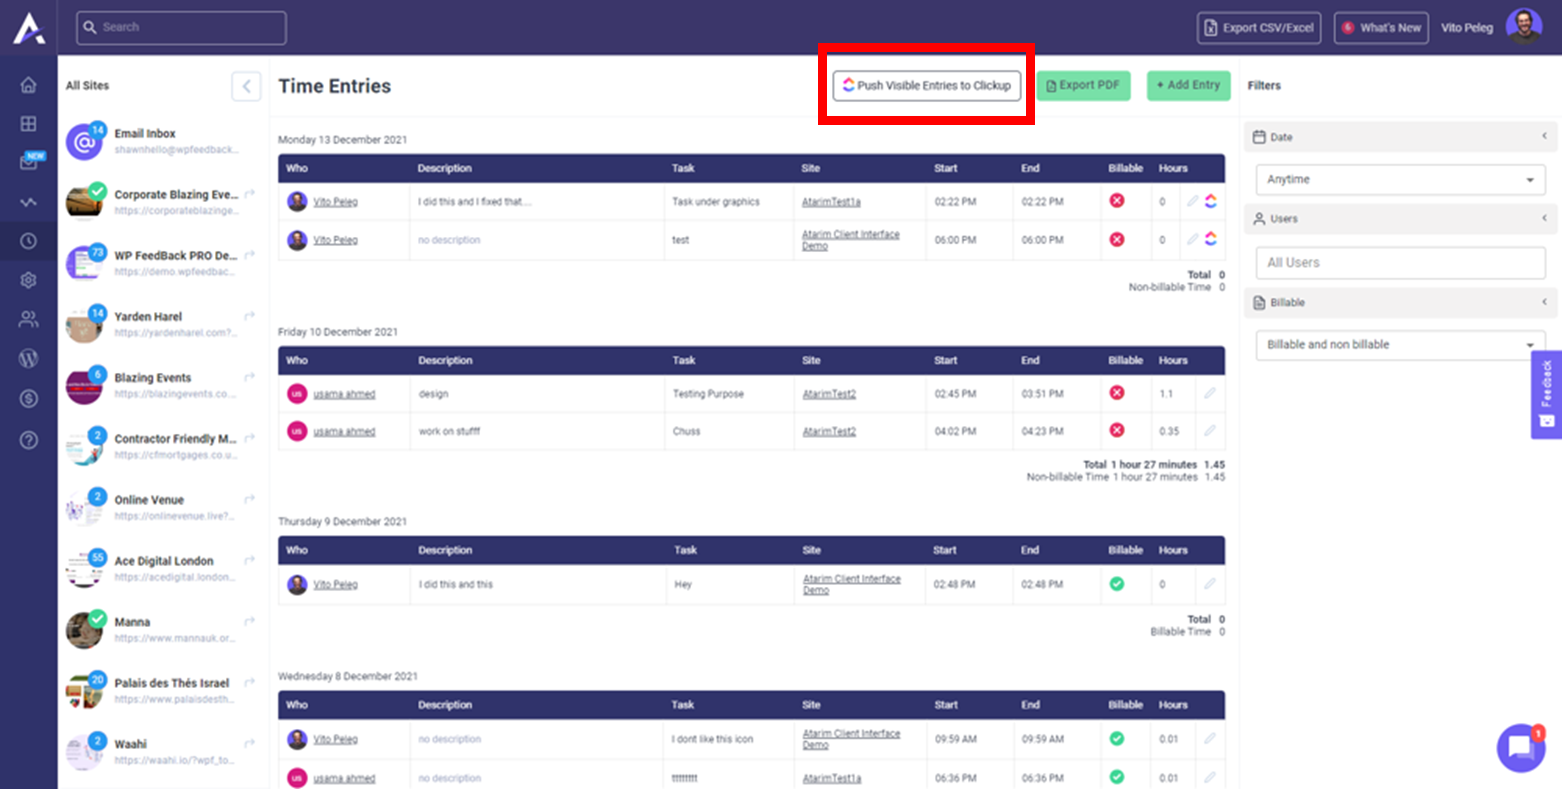
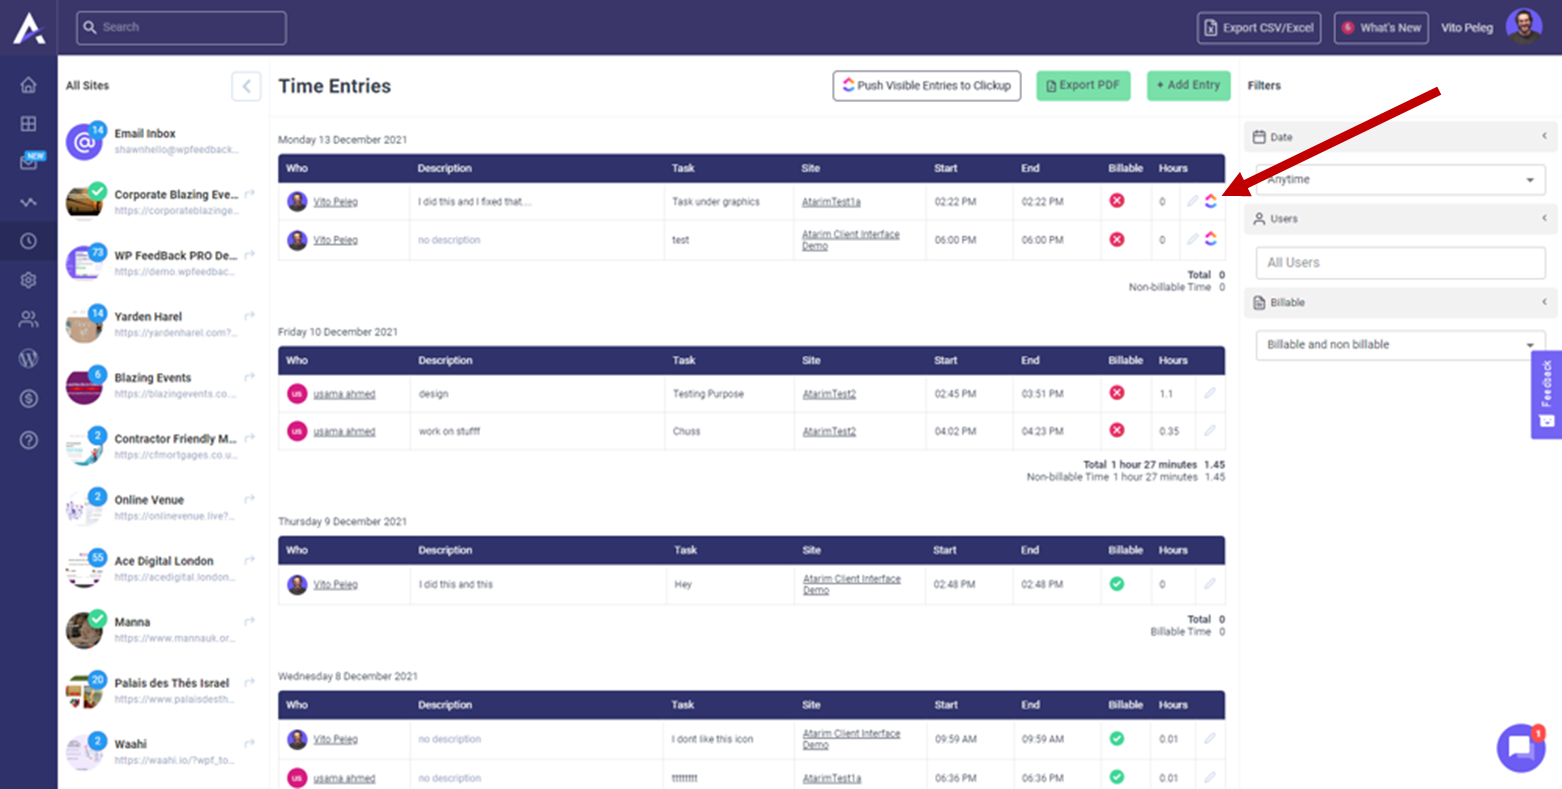
Time Entries: Single and Multiple
- Multiple: You can push multiple filtered time entries from Atarim to ClickUp. You can do it from here:
- Single: You can push a single time entry from Atarim to ClickUp.
If you have any further queries regarding the ClickUp integration, you can reach out to support for additional information!

