

Atarim works in partnership with the WordPress Multilingual Plugin (WPML) out-of-the-box to provide efficient website translations in one of two ways.
By using Atarim’s unique ‘point-and-click’ visual collaboration to leave comments on any web page, tasks can be automatically generated that can be assigned to the WPML translation service.
Alternatively, WPML’s automatic translation tool can be used first, with Atarim’s ‘point-and-click’ feature being used to mark any translated content so that it can be assigned for review.
In this article, we’ll cover how to set up WPML with Atarim for the most effective and responsive website translation workflow.
Install and Configure WPML
To begin with, log in to your account on WPML.org, and then head to the Downloads section. When using WPML for the first time, we recommend following the manual installation by running the OTGS Installer plugin. This approach not only facilitates the installation process but also enables you to register with WPML, ensuring you receive automated updates for all future versions.
When you first activate WPML, a setup wizard will help you identify and configure the essential settings you need to prepare your site for multilingual content. For example:
- Choose your site’s languages.
- Choose your URL format.
- Choose your translation mode.
Now that you have the WPML plugin set up on a website already connected to your Atarim dashboard, you can choose which of the two approaches will work best for you.
The first option is to use the plugin to submit content for translation by the professional translators at WPML, using Atarim to assign and track the translation tasks.
The second option is to use the WPML automatic translation tool and use Atarim to assign the translated content for review.
Let’s look at how to set WPML up for each of these approaches.
Start Collaborating With Your Translators
To start collaborating on your website translation project, it’s essential to ensure that each of your team members has the correct Translator profile assigned. You can manage these assignments in the WPML > Translation Management > Translators tab.

Ensure that you have assigned them the content that needs to be translated.

And that’s it! Collaborators should be available to translate content from the WPML > Translations page.
Creating Translation Tasks
Now that WPML is set up, you only need to create the corresponding tasks and distribute them with your team.
Keep in mind that translation tasks are not different from any other task, and so they are handled following the same workflow as described above:
- Open your Task and check the assignment.
- Go to WPML > Translations.
- Translate your content.
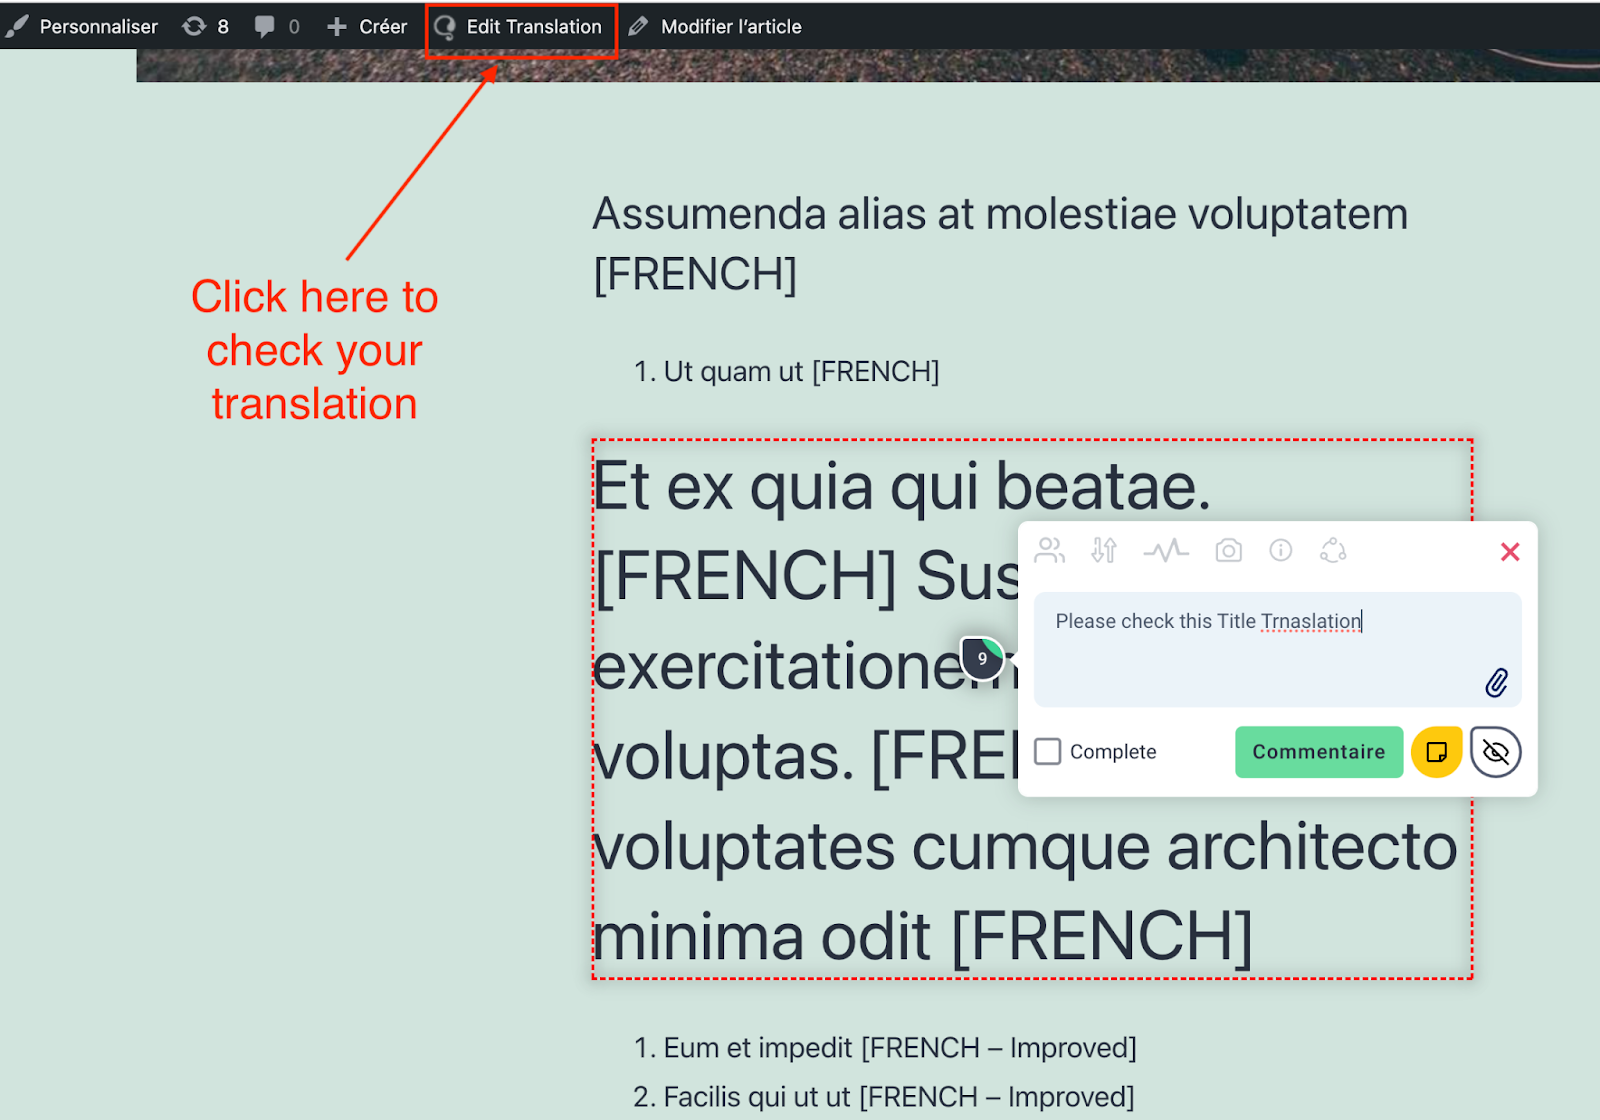
If you are checking your task from the frontend, you will need to click on the “Edit Translation” button in the top bar.
Automatic Translation
As mentioned, you can also consider translating your content using WPML’s automatic translation feature. In this case, you can create a set of Review tasks in Atarim, and ask your collaborators to review the translations before publishing.

When WPML is finished translating your content, a notification appears to tell you that your translations are ready for review. You can find this notification either in the top toolbar or in the Translation Management Dashboard.
Click the notification to go to the translation queue, and then click the Review button. This allows you to preview your translation on the site’s frontend. From there, you just need to either accept the automatic translation or edit it.

