

The task pop-over gives you loads of different options to change the attributes of a task, as well as giving vital information about it.
In this article, we’re going to take you through each aspect of the pop-over and how to use it.
Assigning Users
The first tab is used for assigning and removing users from a particular task.

The checkbox indicates who this task is assigned to.

Users assigned to a task, will receive all notifications (that they have turned on inside their profile) that are sent from this task. For example, if a new comment is made, all assigned users will receive a notification about it.
Urgency
The second tab is used for changing urgency of a task, you have 4 options: low, medium, high, critical. All tasks are set to low by default.

By clicking on one, I will setting the task to the chosen urgency. This is great if your client needs something urgently, instead of blowing up your emails or personal phone, they can simply mark something as critical and let you know that something needs fixing quickly!

Status
The third tab is used for the status of a task. The options are: open task, in progress, pending, complete. All tasks are set to open task by default.

Simply click the current state of the task on the slider, and the task will be set to that status.
In progress is to let you client know you’re working on it, pending review is for a project manager to look at it and approve, complete…well, that’s an obvious one!

Automatic Screenshot
The fourth tab houses the automatic screenshot that was generated when this task was created.

This is super useful, as it will show you the exact view of the task creator. Meaning if they are seeing something on their screen which you are not seeing on yours, you’ll be able to see this in the screen.

It will also show you the highlighted area of when the task was created in comment mode.
Additional Info
The fifth tab is for additional information about the task, including resolution, browser, user name and task ID.

All of these attributes are taken from the task creator. Meaning you will be able to see which resolution and browser the task was created on, further helping you debug issues.
Custom Tags
Inside the additional info tab, you have the option to create custom tags for a task. To add a tag, simply type in what you’d like it to be called and click the icon or press enter

This will then be added as a tag. If you’d like to remove it, click the (X) next to the tag underneath the input field for adding them.

Deleting Tasks
You also have the option to delete a task inside the additional info tab.

By clicking deleting ticket, you’ll be asked if you’re sure (so you don’t accidentally delete any tasks as this is final).

Share
The sixth and final tab is used for sharing this task, where you’ll be able to copy and paste the link to a specific task.

Click the icon on the right to copy it to your clipboard so you can paste it and send it to your client (or team!).
When this link is visited, it will go directly to this task and open the pop-over, making it super useful to sharing tasks.
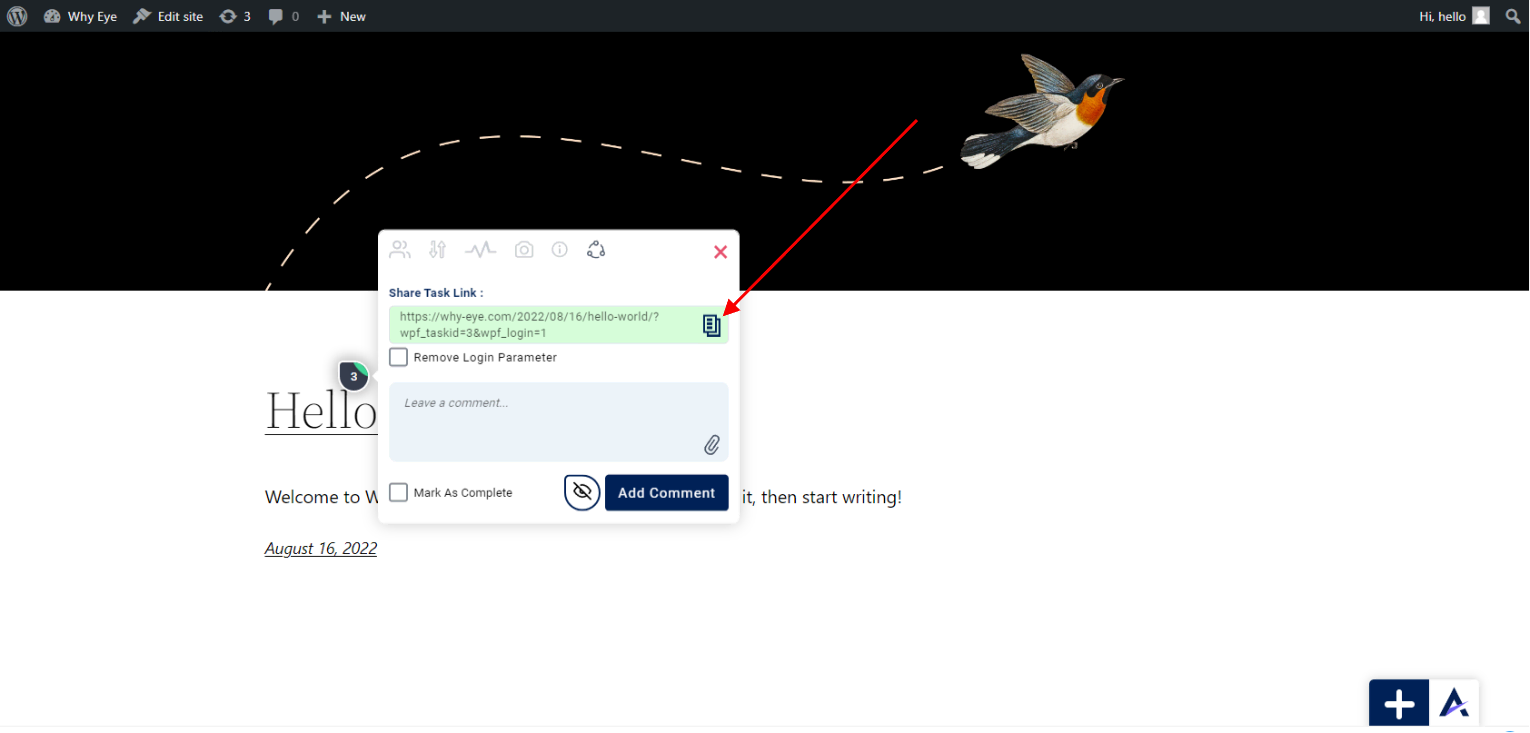
If the user is not logged in, the login parameter attached to the link will cause the Atarim login to pop-up when they visit the link.
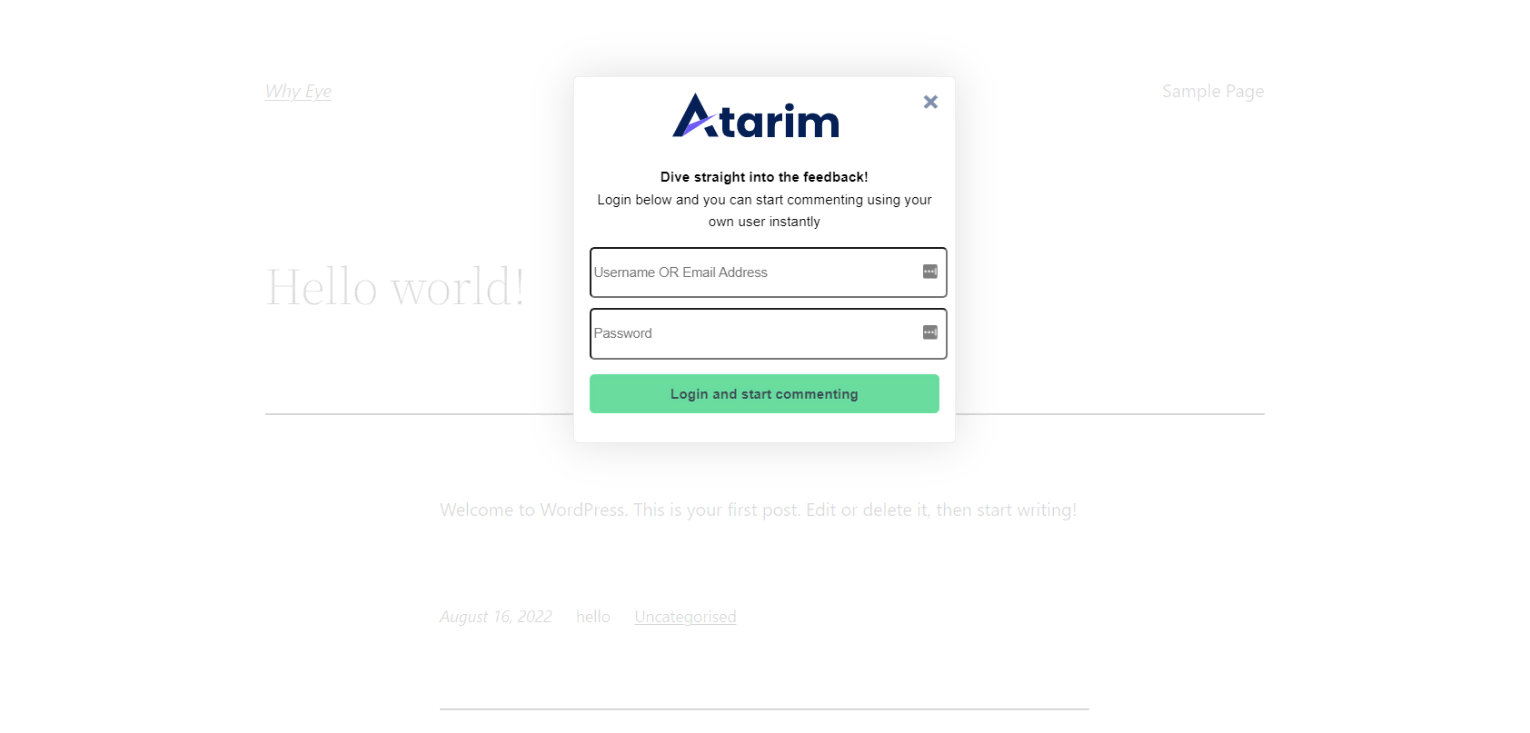
This is just a WordPress login, so users can use their WordPress credentials to get access. If you’d like to remove the login parameter from the link, simply tick this on and you’re good to go!

Getting Support From Us
And that’s it! The task pop-over has loads of different options to create requests while visually collaborating. Every feature is geared towards creating an amazing experience with collaborating with your team and clients.
If you have any questions or need anything in general, you can always reach us on support@atarim.io where we are always happy to help!

